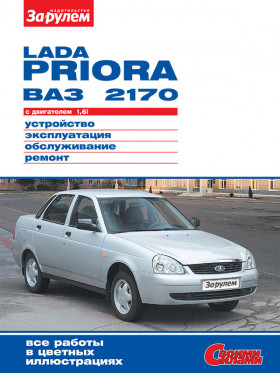
Lada Priora / VAZ 2170 since 2007, repair e-manual (in Russian)
About the manual
Engine type: 21126
Engine capacity: 1.6 l.
Power : 98 hp
In the manual you will find
- Instructions for repair of various vehicle components
- Information on self-service car
- Information on the design of the car and how to prevent failure
- The information for the trip to the service station, if the self-repair is impossible
Content
Technical description
- General information
- Specifications
- Vehicle data sheet
Equipment and controls
- Location of controls and appliances
- The keys to the car. immobilizer and remote control system for power accessories
- Front and rear doors
- Boot lid
- Seats
- Ignition switch (lock)
- Instrument cluster
- Steering wheel adjustment handle
- Fuel filler cap
- Seat belts
- Hood
- Interior light
- Gearshift paddles
- Switches on the dashboard console
- Control unit for outdoor lighting, instrument lighting and the direction of the beams of headlights
- Heating and ventilation control unit
Car operation
- Oversized cargo transportation
- Wheels and tires
- Features of winter operation
- Repair in transit
- Wheel replacement
- Replacement of outdoor lamps
- Starting the engine from the battery of another car (“lighting”)
- Car towing
Safety precautions for maintenance and repair
Maintenance
- Location of the main components and assemblies of the car
- Checking the car
- Maintenance schedule
- Checking the condition of wheels and tires
- Refill fluid level in the windshield washer reservoir
- Replacing the windshield wiper blades
- Checking the oil level in the oil pan
- Changing engine oil and oil filter
- Checking the level and adding coolant
- Coolant replacement
- Checking the level and adding oil to the gearbox
- Gearbox oil change
- Replacing the fluid in the hydraulic brake system
- Checking the fluid level in the brake reservoir
- Bleeding the hydraulic brake system
- Checking the condition of the alternator drive belt
- Alternator belt replacement
- Checking condition and replacing spark plugs
- Replacing the fuel filter
- Replacing the air filter element
- Replacing the filter for the heating and ventilation system
- Checking the condition of the chassis and transmission
- Checking steering status
- Checking the condition of the brake system
- Parking brake adjustment
- Headlight beam adjustment
Diagnostics of malfunctions
- Engine and its systems
- Transmission, chassis, steering and braking system
- Electrical equipment
Engine
- Design description
- Removing the low oil pressure switch sensor
- Timing belt replacement
- Replacing camshaft oil seals
- Removing camshafts and replacing valve pushers
- Removing the cylinder head
- Replacing valve stem seals
- Replacing the front crankshaft oil seal
- Replacing the crankshaft rear oil seal
- Removing the oil pan
- Removing the oil receiver
- Removing the oil pump
- Dismantling and assembling the oil pump
- Dismantling the connecting rod and piston group in a car
- Removing the powertrain support
- Removing and installing the engine
- Dismantling and assembling the engine
Engine management system
- Design description
- Removing engine control relay and fuses
- Removing the controller
- Removing the crankshaft position sensor
- Removing the phase sensor
- Removing the coolant temperature sensor
- Removing the throttle position sensor
- Removing the mass air flow sensor
- Removing the vehicle speed sensor
- Removing the knock sensor
- Rough road sensor removal
- Removing oxygen concentration sensors
Power system
- Design description
- Removing and disassembling the fuel module
- Removing the fuel rail and injectors
- Removing and checking idle speed regulator
- Throttle removal
- Intake manifold removal
- Removing the fuel tank
- Removing the separator and gravity valve
- Removing the canister purge solenoid valve
- Adsorber removal
- Removing the air filter
- Replacing the throttle cable
Cooling system
- Design description
- Removing and checking the thermostat
- Removing the expansion tank
- Removing the radiator fan
- Removing the radiator
- Removing the coolant pump
- Removing the coolant temperature gauge sensor
Exhaust system
- Design description
- Replacing the gasket in the connection of the collector and the optional silencer
- Exhaust system suspension pads replacement
- Collector removal
- Replacing the optional silencer
- Replacing the main silencer
Grip
- Design description
- Clutch release cable replacement
- Removing clutch parts
Gearbox
- Design description
- Jet thrust removal
- Replacing the sleeves and damper of the jet thrust tip
- Removing and disassembling the gearbox control drive
- Replacing the front wheel drive oil seal
- Replacing the gearshift rod hinge cover
- Replacing the gearbox stem oil seal
- Gearbox removal
- Replacing the stuffing box seal
- Gearbox disassembly and assembly
Front wheel drive
- Design description
- Removing front wheel drives
- Removing the outer joint
- Removing and disassembling the inner joint
Front suspension
- Design description
- Removing the ball joint
- Removing the shock absorber strut and its disassembly
- Removing the lever, replacing the silent blocks
- Stretch remover
- Removing the anti-roll bar
- Removing the anti-roll bar, replacing the pillows
- Front wheel bearing replacement
- Replacing the silent blocks of the front suspension cross member
- Removing the front suspension crossbar
Rear suspension
- Design description
- Removing the shock absorber and spring
- Replacing the silent block of the beam arm
- Removing the rear suspension beam
- Rear wheel bearing replacement
Steering
- Design description
- Replacing the outer tie rod end
- Steering link removal
- Removing the intermediate shaft
- Steering wheel removal
- Steering column removal
- Steering gear removal
- Steering gear cover replacement
- Dismantling and assembling the steering gear
Brake system
- Design description
- Replacing the brake pads of the front wheels
- Replacing the brake pads of the rear wheels
- Removing the brake master cylinder
- Removing the brake servo
- Removing the check valve of the vacuum brake booster
- Removing the front wheel brake disc
- Replacing the front wheel brake hose
- Replacing the front wheel brake cylinder and anthers
- Replacing the wheel cylinder of the rear wheel brake mechanism
- Replacing the brake hose of the rear wheel
- Removing the pressure regulator in the brakes of the rear wheels and adjusting its drive
- Removing the parking brake components
Electrical equipment
- Design description
- Replacing fuses and relays
- Removing the ignition switch, replacing the contact group and immobilizer coil
- Removing the generator
- Dismantling and assembling the generator
- Starter removal
- disassembly of the starter
- Replacing the lamps in the headlamp
- Removing the headlamp
- Removing the side direction indicator, replacing the lamp
- Replacing the reversing light switch
- Removing the taillight, replacing the lamps
- Removing the brake light switch
- Removing the parking brake switch
- Replacing the license plate lamp
- Removing the license plate light
- Replacing the interior light bulb, removing the lampshade
- Replacing the lamp for the trunk light, removing the lamp
- Removing the steering column switches, the connector of the switches and the drum device of the spiral cable
- Beeping
- Alarm sounding
- Removing the windshield wiper
- Removing the pump and windshield washer reservoir
- Removing instrument cluster, replacing lamps
- Removing the control unit for outdoor lighting, instrument lighting and the direction of the beams of headlights
- Removing the remote control system electrical package
- Removing the driver’s airbag
- Removing the driver airbag control unit
- Removing the outdoor temperature sensor
Body
- Design description
- Removing the mudguard of the power unit
- Removing the mudguards of the engine compartment
- Removing mudguards and front wheel arch liners
- Door sill removal
- Removing the hood lock
- Replacing the hood lock rod
- Removing the front bumper
- Removing the rear bumper
- Removing the exterior rearview mirror
- Removing the external door lock
- Removing the front door hinge
- Removing the front door glass
- Removing the front door power window mechanism
- Removing the internal lock, cylinder lock mechanism and external front door handle
- Removing the rear door trim
- Removing the rear door glass
- Removing the rear window regulator
- Removing the inner lock and outer handle of the rear door
- Removing the tailgate lock
- Removing the floor tunnel lining
- Removing the front seat
- Removing the rear seat
- Removing the instrument panel console trim
- Removing the dashboard
- Removing the windshield trim
- Removing the front flap trim
Heating and ventilation system
- Design description
- Removing additional heater fan resistor
- Heater fan removal
- Removing the micromotor-reducer of the heater flap
- Heater removal
- Removing the heater radiator
- Removing the heating and ventilation control unit
- Removing the interior temperature sensor
Applications
- Tools used in car repair
- Tightening torques for critical threaded connections
- Applicable fuels, lubricants and operating fluids
- Lip seals (oil seals) and rolling bearings
- Lamps used in the car
Schemes of electrical equipment (wiring diagrams)
- Electronic engine control system diagram
- Dashboard wiring harness connection diagram
- Rear wiring harness connection diagram
- Front wiring harness diagram
- Connection diagram for the wiring harness, right front door
- Connection diagram for the rear door wiring harness
- Trunk lid harness wiring diagram


