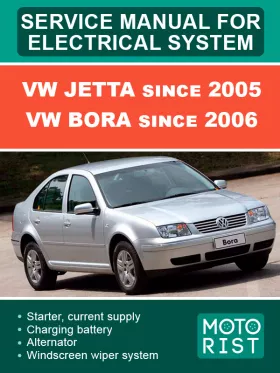
VW Jetta since 2005 / VW Bora since 2006 electrical system, repair e-manual
Only original manuals
Available immediately after payment
Full compliance with the paper edition
100% protection of your payments
(9)
9
10
4
Publisher: © "Motorist"
ISBN: 978-088-927-309-6
Number of pages: 317
Format: file PDF
About the manual
Engine type: petrol / diesel
In the manual you will find
- Step-by-step guide to repair various components and assemblies
- Self-care and maintenance instructions
- Engine design and prevention information
- Information for a trip to the service station, if self-repair is not possible
Publisher:
Motorist
Only original manuals
Available immediately after payment
Full compliance with the paper edition
100% protection of your payments
Publisher: © "Motorist"
ISBN: 978-088-927-309-6
Number of pages: 317
Format: file PDF
About the manual
Engine type: petrol / diesel
In the manual you will find
- Step-by-step guide to repair various components and assemblies
- Self-care and maintenance instructions
- Engine design and prevention information
- Information for a trip to the service station, if self-repair is not possible
Content
Starter, current supply, CC
- Battery
- Fundamentals for batteries
- Types of battery
- Warning notices and safety regulations
- Battery terminal connection
- Checking battery
- Procedure when checking the battery
- Visual check
- Checking battery with magic eye
- Checking low maintenance battery
- Check no load voltage of battery
- Battery tester with printer VAS 5097 A
- Evaluating test result
- Charging battery
- Battery charger VAS 5095 A
- Battery charger VAS 5900
- Totally discharged batteries
- Disconnecting and reconnecting batteries
- Disconnecting battery
- Connecting battery
- Removing and installing battery
- Models with a petrol engine
- Models with a diesel engine
- Torque settings: battery
- Starter
- Checking starter B
- Removing and installing starter, automatic gearbox
- Removing and installing starter, automated shift gearboxes
- Removing and installing starter, manual gearbox
- Torque settings: starter
- Alternator
- Fastening B+ wire to alternator
- Checking ribbed belt (poly V-belt)
- Check alternator C
- Alternator, 1.6 l injection engine
- Alternator, 1.6 l FSI engine
- Alternator, 2.0 l FSI engine
- Alternator, 2.0 l FSI turbo engine
- Alternator 2.5 l injection engine
- Alternator, 1.9 l TDI engine
- Alternator, 2,0 l TDI engine
- Removing and installing ribbed belt (poly V-belt) pulley on alternator
- Voltage regulator for alternator
- Torque settings: alternator
- General torque settings for all vehicles
- 1.6 l injection engine and 2.0 l FSI engine
- 2.0 l FSI turbo engine
- 1.9 l and 2.0 l TDI engine
- 2.5 l injection engine
- Cruise control system (CCS)
- Activating and deactivating cruise control system
Instruments, GCI
- Dash panel insert
- Renewing dash panel insert
- Removing and installing dash panel insert
- Description of reverse side of dash panel insert
- Warning lamp symbols in dash panel insert
- Service interval display
- Resetting service interval display
Windscreen wash/wipe system
- Windscreen wiper system
- Deactivating APP function of wiper motors
- Removing and installing the windscreen wiper system
- Removing and installing wiper arms
- Adjusting wiper blade park position
- Removing and installing aerodynamic wipers
- Removing and installing rain and light detector sensor G397
- Windscreen washer system
- Assembly overview of windscreen washer system
- Removing and installing reservoir for windscreen and headlight washer systems
- Removing and installing washer pump V5
- Removing and installing windscreen washer spray jets
- Adjusting front windscreen washer system spray jets
- Headlight washer system
- Assembly overview - headlight washer system
- Removing and installing headlight washer system pump V11
- Removing and installing pop-up spray jet cylinder
- Removing and installing spray jet assembly
- Adjusting headlight washer system jets
- Bleeding the headlight washer system
- Wash water line hose couplings
- Windscreen and rear window washer system
- Headlight washer system
- Hose repair
- General description
- Repairing smooth pipe
- Repairing corrugated pipe
- Torque settings: Windscreen wash/wipe system
Lights, lamps, switches - outside
- Headlight
- Assembly overview, Headlight
- Removing and installing headlights
- Adjusting headlight installation position
- Renewing headlight bulbs
- Servicing headlight securing lugs
- Adjusting headlights
- Main headlights with gas discharge bulbs
- Assembly overview - gas discharge headlights
- Removing and installing headlights
- Adjusting headlight installation position
- Renewing headlight bulbs
- Removing and installing headlight range control motor
- Removing and installing gas discharge light control unit
- Headlight range control unit J431
- Vehicle level sender
- Servicing headlight securing lugs
- Adjusting headlights
- Fog lights
- Assembly overview - fog light
- Removing and installing fog lights
- Removing and installing fog light bulb
- Adjusting fog lights
- Removing and installing side marker in front bumper
- Removing and installing front side marker
- Mirror turn signal bulb and entry light in exterior mirror
- Removing and installing turn signal bulb
- Removing and installing entry light in exterior mirror
- Tail lights
- Assembly overview - tail light in side panel
- Removing and installing tail light in side panel
- Removing and installing tail light bulb carrier in side panel
- Assembly overview - tail light in tailgate
- Removing and installing tail light in tailgate
- Removing and installing tail light bulb carrier in tailgate
- Number plate lights
- Removing and installing number plate light X
- Additional brake light
- Removing and installing high level brake light bulb M25
- Steering column switch
- Assembly overview - steering column switch
- Removing and installing steering column switch
- Steering column electronics control unit J527
- Steering angle sender G85
- Ignition switch and lock cylinder
- Removing and installing steering lock housing
- Removing and installing lock cylinder
- Removing and installing ignition switch
- Parking aid
- Assembly overview - parking aid
- Removing and installing parking aid control unit J446
- Removing and installing parking aid sensor
- Removing and installing rear parking aid warning buzzer H15
- Final control diagnosis
- Torque settings: lights, bulbs, switches - exterior
- Torque settings: headlight
- Torque settings: fog lights
- Torque settings - tail light in side panel
- Torque settings - tail light in tailgate
- Torque settings: vehicle level sender
Lights, lamps, switches - inside
- Lights and switches in engine compartment
- Removing and installing bonnet contact switch F266
- Lights and switches in dash panel
- Removing and installing light switch E1
- Removing and installing glove compartment light W6
- Removing and installing glove compartment light switch E26
- Removing and installing switches and instruments illumination regulator E20
- Removing and installing front passenger side airbag deactivated warning lamp K145
- Removing and installing hazard warning light switch E3
- Removing and installing left footwell light W9 and right footwell light W10
- Removing and installing key operated switch to deactivate front passenger side airbag E224
- Lights and switches in front doors
- Removing and installing window regulator switch in front passenger door E107
- Removing and installing switch module for driver side mirror adjustment
- Removing and installing driver side interior locking button for central locking system E308
- Components - front door locks
- Removing and installing switch module for driver side window lift
- Removing and installing remote release button for fuel filler flap and rear lid E463 and key operated switch to block release of rear lid remote E232
- Lights and switches in rear doors
- Components - front door locks
- Removing and installing rear left window regulator switch, in door E52 and rear right window regulator switch, in door E54
- Lights and switches in luggage compartment
- Removing and installing luggage compartment light W3
- Removing and installing rear lid lock unit F256
- Lights and switches in roof trim
- Removing and installing front interior light and reading light (vehicles with no sliding sunroof)
- Removing and installing front interior light and reading light (vehicles with sliding sunroof)
- Rear interior and reading light (vehicles without ATAS)
- Rear interior and reading light (vehicles with ATAS)
- Removing and installing front passenger side illuminated vanity mirror W14 and driver side illuminated vanity mirror W20
- Removing and installing garage door operating unit E284
- Lights and switches in centre console
- Removing and installing TCS and ESP button E256
- Horn
- Removing and installing treble tone horn H2 and bass tone horn H7
- Checking treble tone horn H2 and bass tone horn H7
- Immobilizer
- Immobilizer control unit J362
- Immobilizer reader coil D2
- Ignition key
- Anti-theft alarm system (ATAS)
- Activating and deactivating anti-theft alarm system
- Removing and installing anti-theft alarm ultrasonic sensor G209
- Removing and installing vehicle inclination sender G384
- Central locking and anti-theft alarm system aerial R47
- Alarm horn H12
Wiring
- Vehicle Diagnosis, Testing and Information Systems
- Connecting vehicle Diagnosis, Testing and Information System VAS 5051A
- Removing and installing fuse holder
- Removing and installing fuse holder on left of dash panel
- Removing and installing relay carrier
- Removing and installing relay carrier with safety cut-out on left of dash panel
- Removing and installing relay carrier on onboard supply control unit, on left of dash panel
- Electronics boxes
- Removing and installing electronics box on left in engine compartment
- Control units
- Onboard supply control unit J519
- Data bus diagnostic interface J533
- Central control unit for convenience system J393
- Trailer detector control unit J345
- Wiring harness and connector repairs
- Safety instructions
- General notes concerning repairs to vehicle electrical system
- Notes on repairs to wiring harness and connectors
- Supplementary notes on repair of CAN bus wiring
- Wiring harness repair set V.A.G 1978
- Renewal of aerial wiring
- General description
- Assembly overview - an aerial wire
- Installing a new aerial wire
- Torque settings: Cables
- Torque settings: Electronics box in left side of engine compartment
- Torque settings trailer detector control unit J345
Customers reviews
from Андрей on 08/03/2021
Заказывал книгу. Быстрое и оперативное обслуживание. Спасибо огромное )
from Елена on 07/07/2021
Все четко и быстро. Спасибо)
from Ольга on 15/07/2021
Покупала книгу для мужа, он доволен, говорит что очень полезно
from Володя on 04/08/2021
Давно дружу с этим сайтом, покупал не однократно. Книги хорошие.


