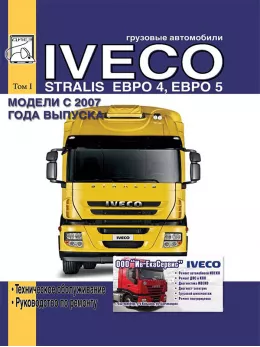
Iveco Stralis since 2007, repair e-manual (in Russian), volume 1
Only original manuals
Available immediately after payment
Full compliance with the paper edition
100% protection of your payments
(9)
9
10
1
Publisher: © "Diez"
ISBN: 978-5-903883-93-6
Number of pages: 352
Format: file PDF
About the manual
Engine type: F2B / F3A
In the manual you will find
- Instructions for repair of various vehicle components
- Information on self-service car
- Information on the design of the car and how to prevent failure
- The information for the trip to the service station, if the self-repair is impossible
Only original manuals
Available immediately after payment
Full compliance with the paper edition
100% protection of your payments
Publisher: © "Diez"
ISBN: 978-5-903883-93-6
Number of pages: 352
Format: file PDF
About the manual
Engine type: F2B / F3A
In the manual you will find
- Instructions for repair of various vehicle components
- Information on self-service car
- Information on the design of the car and how to prevent failure
- The information for the trip to the service station, if the self-repair is impossible
Content
General information
- Vehicle identification
- Models complete set
- Decryption
- Lubricants
- F2B engine
- F3A engine
- Switch boxes (volume filled during the first filling)
- Hub (one)
- Rear axle
F2B Engines
- Engine identification
- Specifications
- Options
- Specifications
- Cylinder block and crank mechanism
- Crankshaft
- Valve actuator
- Cylinder head
- Tightening torques for screw connections
- Powertrain
- Removing and installing engine
- Withdrawal
- Installation
- Filling the cooling system
- Preliminary operations
- Filling the system
- Removing air from the cooling system
- Removing air from the power supply system
- Replacing the magnetic fan clutch
- Withdrawal
- Installation
- Dismantling the engine at the stand
- Cylinder block
- Checks and measurements
- Replacing the cylinder liner
- Withdrawal
- Install and check protrusion
- Crankshaft
- Crankshaft journal measurements
- Preliminary determination of the size group of the liners of the main and connecting rod bearings of the crankshaft
- Selection of main and connecting rod bearing shells
- Determination of the size group of the diameter of the main and connecting rod journals (journals of nominal diameter)
- Selection of main bearing shells (ground journals)
- Selection of main bearing shells (nominal diameter journals)
- Selection of bearing shells of the lower connecting rod head (journal of nominal diameter)
- Selection of the bearing shells of the lower end of the connecting rod (ground journals)
- Replacing the timing gear and oil pump
- Checking the crankshaft end play
- Checking installation clearances
- Piston
- Disassembly
- Piston rings
- Connecting rod
- Crankset marking scheme
- Alignment check
- Curl check
- Bending test
- Installing piston rings
- Installing the piston and connecting rod assembly into the sleeve
- Checking the connecting rod journal clearance
- Cylinder head
- Removing valves
- Checking the bottom plane of the cylinder head
- Valves
- Removing carbon deposits and checking valves
- Valve guides and seats
- Replacing the valve guides
- Replacing valve seats
- Replacing the injector sleeves
- Gas distribution mechanism
- Replacing bushings
- Camshaft
- Camshaft bushings
- Valve Springs
- Installing valves and valve stem seals
- Bal rocker arms
- Assembling the engine at the stand
- Adjusting the timing
- Valve clearance adjustment
- Adjusting the preload of the injector rocker arms
- Lubrication system
- Oil pump
- Heat exchanger
- Oil filter
- Valve in the piston coolant sprayer
- Cooling system
- Pressurization system
- Functional principle of the VGT turbocharger
- Actuator (drive)
- Power system
- Fuel pump
- Injector
- Replacing injectors
- Phases of injector operation
F3A Engines
- Engine designation
- Specifications
- Parameters, F3A engine
- Specifications
- Cylinder block and crank mechanism
- Crankshaft
- Valve actuator
- Cylinder head
- Tightening torques for screw connections
- Removing and installing engine
- Withdrawal
- Installation
- Filling the cooling system
- Removing air from the power supply system
- Replacing the magnetic fan clutch
- Withdrawal
- Installation
- Dismantling the engine at the stand
- Cylinder block
- Checks and measurements
- Replacing cylinder liners
- Crankshaft
- Crankshaft journal measurements
- Selection of main and connecting rod bearing shells
- Replacing the timing gear and oil pump
- Checking installation clearances
- Checking the crankshaft end play
- Piston
- Piston rings
- Connecting rod
- Crankset marking scheme
- Connecting rod bush
- Valves
- Valve guides and seats
- Replacing the injector sleeves
- Gas distribution mechanism
- Camshaft
- Camshaft bushings
- Valve springs
- Rocker shaft
- Assembling the engine at the stand
- Lubrication system
- Cooling system
- Electromagnetic fan clutch
- Pressurization system
- Power System
HIDROCAR power take-off on the gas distribution mechanism (option)
- Removal / Installation
DENOX emission control system
- Repair
Diagnostics
- Diagnostic devices
- Description of fault codes
Clutch
- Specifications, 17 "clutch for E2B / FZA engines
- Specifications, clutch 17 "for F2B engines with gearbox 9S 1310 TO / 9S 1311 TO 129
- Troubleshooting
- Tightening torques for screw connections
- Clutch removal and installation
- Replacing the clutch release bearing
- Replacing the clutch shaft support bearing
- Removing and installing SATA pedal unit
- Checking and adjusting the clutch pedal travel stops (vehicles with ABS)
- WABCO pedal (vehicles with EBS)
- Clutch pedal travel stop bolt
- Clutch pedal free play
- Pedal Control Valve Stroke
- Hydraulic steering (vehicles with ABS)
- Clutch Actuator (without friction lining wear indicator)
- Specifications (manual transmission)
- Pusher (rod) length adjustment
- Bleeding the clutch system
- Specifications (automatic transmission)
- Adjusting the length of the slave cylinder pusher (new clutch)
- Installing the slave cylinder
- Replacing the slave cylinder
Gearboxes
- Gearbox ZF 9 S 1310 TO
- Specifications
- Gearbox ZF 16 S 1620Т.D .; ZF 16 S 1920 T.D ;; ZF 16 S 2220 T.D. / T.O.
- Specifications
- Tightening torques for screw connections
- Removal and installation
- Gearbox ZF 16 S1621TD; ZF 16 S1921TD; ZF 16 S 2221 TO. / TO
- Removing the intarder
- Removing the rear case of the planetary gear unit
- Removing the planetary gear assembly
- Installing the planetary gear unit
- gearbox EUROTRONIC 12 AS 1420 TD.
- Specifications
- Gearbox EUROTRONIC AUTOMATED 12 AS 1930 TD. 12 AS 2330 TD. / TO
- Specifications
- Gearbox removal and installation
- Gearbox EUROTRONIC AUTOMATED 12 AS 1931 TD. 12 AS 2331 TD. / TO
- Removing and installing intarder
- Determining the thickness of the bearing shim
- Determining the thickness of the stator adjusting ring
- Removing the rear of the gearbox housing
- Disassembly of the planetary gear
- Planetary gear assembly
- ALLISON 3200 gearbox
- Specifications
- Tightening torques for screw connections
- Troubleshooting
- Removal and installation
- Diagnostics of the ELECTRONIC gearbox
- Fault codes
Hydraulic retarder (intarder)
- General information
- How it works
- Removing and installing retarder, gearbox ZF 16 S 1920/2220
- Withdrawal
- Installation
- Oil filling
- Specifications
- Tightening torques for screw connections
- Troubleshooting
- Retarder repair
- Removing the accumulator
- Installing the accumulator
- Dismantling the retarder
- Checking the technical condition of the retarder parts
- Retarder assembly
Cardan shafts
- Specifications
- Troubleshooting
- Removing and installing propeller shaft
- Checking the propeller shaft on the vehicle
- Disassembly and assembly of universal joints
- Disassembly and assembly of the support
Rear axle
- Troubleshooting
- faults
- Removing and installing rear axle
- Removing and installing differential from the rear axle (without removing the axle from the car)
- Rear axle ARVIN MERITOR MS 13-175 205 Specifications
- Wheel hub repair
- Differential removal and installation
- Differential repair
- Dismantling the differential box
- Removing the drive bevel gear from the support
- Checking differential components
- Determining the thickness of the stator shim
- Differential box assembly
- Installing the pinion pinion support
- Differential housing assembly
- Adjusting the distance between the covers
- Correction of the contact patch of the final drive gears
- Replacing the pinion support oil seal
- Rear axle 451391/1
- Specifications
- Repair
- Differential removal and installation
- Differential repair
- Tandem rear axle ARVIN MERITOR MT23-155 / D
- Specifications
- Wheel hub repair
- Center differential
- Removing and installing axle differential
- Output shaft removal and installation
- Rear axle ARVIN MERITOR MR11-155 / D
- Specifications
Front axle
- Front axles 5876/4; 5876/5; 5886/5 and and steered additional front axle 5876/4
- Specifications
- Troubleshooting
- Front axle removal and installation
- Additional steering axle (6x2 vehicles)
- Filling and bleeding hydraulic circuits
- Loop 1
- Loop 2
- Additional lifting steerable axle, 6x2 vehicles
- Checking the ball joint play of the steering link
- Front axle repair
- Removing and installing hubs
- Tie rod removal and installation
- Replacing the tie rod ball joints
- Removing and installing steering knuckle pivot
- Additional rear axle 55080 / D1
- Specifications
- Removal and installation
- Repair
- Optional lift rear axle 56082 / D1 with hydraulic raise / lower
- Specifications
- Removal and installation
- Repair
- Wheel alignment angles
- Optional steered rear axle 57080 / D 1 with pneumatic lift / lower
- Specifications
- Repair
- Hydraulic steering axle steering
- Checking nitrogen pressure and charging the hydraulic accumulator
- Slave cylinder
- Centering cylinder
- Bleeding hydraulic system
- Air suspension and pneumatic axle lift system
- Troubleshooting
- Tightening torques of threaded joints of parts of the steering mechanism and the device for raising and lowering
- Removal and installation of raising and lowering an additional steering axle
- Wheel alignment angles
Steering
- Specifications
- Removing and installing power steering
- Steering arm removal and installation
- Removing and installing steering column assembly
- Replacing the pneumatic cylinder
- Bleeding the power steering circuit
- Measuring steering play with the steering wheel
- Checking the maximum pressure in the power steering
- Troubleshooting
Wheels and tires
- Troubleshooting
- Static wheel balancing
- Tire pressure
Cab and frame
- Specifications
- Repair
Maintenance
- Cars with CURSOR 8 (F2B) engine
- Maintenance Descriptions
- Cars with CURSOR 10 (F3A) engine
- Maintenance Descriptions
Abbreviations
Customers reviews
from Антон on 05/08/2021
Ремонт с этим руководством стал намного проще. Да и на СТО теперь нет необходимости лишний раз ехать. Начинал с диагностики, теперь вот думаю заняться тормозами.


